


2 years warranty
The warranty for our machine is one year longer than the warranty provided by other factories.
ISO CE SGS approved
Professional certification bodies certify that the machines are of high quality.
Strong service team
We will give response within 24 hours against your problem by our professional engineer.
Fundamentals: What Is Resin 3D Printing for Jewelry?
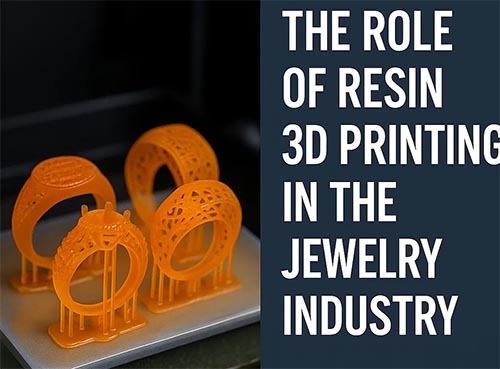
1.1, The Role of Resin 3D Printing in the Jewelry Industry
Resin 3D printing is a cutting-edge digital manufacturing technology that uses photopolymer resins to produce ultra-precise jewelry prototypes. Compared to traditional hand-carved wax or rubber molds, resin 3D printing significantly speeds up production, improves precision, and enhances design flexibility for rings, pendants, earrings, bracelets, and more.
As demand for custom jewelry and rapid production continues to grow, more and more jewelers are adopting resin 3D printers to meet these evolving needs.
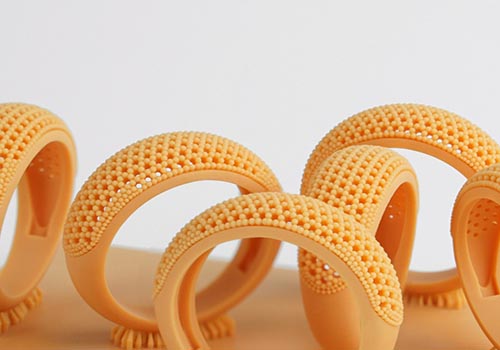
- 1. High Precision for Complex Designs
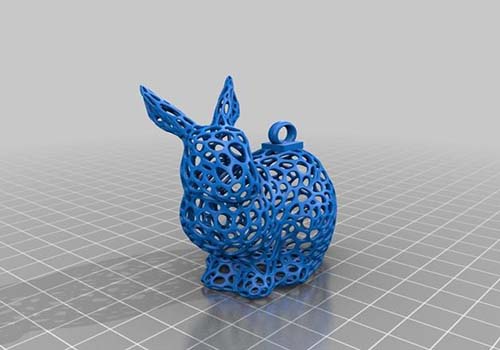
Resin 3D printers offer layer resolutions as fine as 25 microns, allowing for unmatched detail in every curve, gemstone setting, and filigree pattern.
- 2. Faster Production, Shorter Lead Time
Unlike traditional wax carving or mold making, resin 3D printing allows you to turn your CAD designs into physical prototypes within hours, not days.
- 3. Cost-Effective for Small-Batch and One-Off Production
No expensive molds are needed. Resin 3D printing is ideal for short-run manufacturing and custom orders, reducing material waste and tooling costs.
- 4. Seamless Integration with Lost-Wax Casting
Castable resins are specially formulated for clean burnout, making them fully compatible with traditional lost-wax casting processes using gold, silver, platinum, and other precious metals.
Applications of Resin 3D Printing in Jewelry
- Custom engagement rings
- Personalized name necklaces
- Lightweight, artistic earrings
- Fashion jewelry prototypes
- Small-batch artisan jewelry collections
Whether you’re a boutique brand or a production facility, jewelry 3D printing empowers you to experiment freely and iterate quickly.
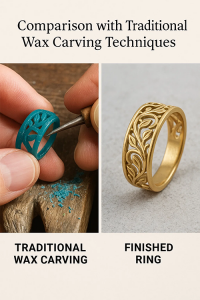
1.2, Comparison with Traditional Wax Carving Techniques
Which is better for modern jewelry design and production?
1. Production Process
| Aspect | Traditional Wax Carving | Resin 3D Printing |
|---|---|---|
| Workflow | Hand-sculpted by artisans using tools | Designed in CAD, printed digitally |
| Skill Dependency | Highly reliant on manual skill and craftsmanship | Relies on digital modeling and printer calibration |
| Repeatability | Difficult to reproduce identical models | Digital files ensure precise replication |
| Aspect | Traditional | 3D Printing |
|---|---|---|
| Time per model | 4–10 hours depending on complexity | 2–6 hours for multiple parts printed simultaneously |
| Iteration speed | Slow (re-sculpt needed) | Fast (edit CAD file and reprint) |
| Batch production | Inefficient | Efficient – multiple parts in one print job |
| Feature | Traditional Carving | Resin 3D Printing |
|---|---|---|
| Design Complexity | Limited by hand tools and skill | Excellent for intricate, organic, and hollow designs |
| Symmetry and Accuracy | Hard to perfect by hand | CAD ensures perfect symmetry and dimensional accuracy |
| Micro-detailing | Challenging for fine structures | Supports high-resolution (25–50 microns) features |
4. Cost & Materials
| Factor | Traditional Wax | Resin 3D Printing |
|---|---|---|
| Labor Cost | High (requires trained artisan) | Low (single operator can run multiple printers) |
| Tooling/Molds | May require silicone/rubber molds | No mold needed unless mass-producing |
| Material Waste | Often more waste during carving | Efficient material use; unused resin can be filtered and reused |
5. Customization & Flexibility
| Capability | Wax Carving | Resin Printing |
|---|---|---|
| Personalized Orders | Time-consuming to modify | Easy to edit CAD and reprint |
| Mass Customization | Impractical | Ideal for small-batch variations |
| Prototyping | Slow and costly | Rapid and cost-effective for A/B testing |
6. Conclusion: Which Should You Choose?
Use Traditional Wax Carving if:
You’re creating a one-of-a-kind artisan piece
You want a handmade touch or antique feel
You have master-level carving skills in-house
Use Resin 3D Printing if:
You need to scale production or increase design speed
You offer customized jewelry or frequent design changes
You want higher detail and faster turnaround
Many modern workshops combine both: using 3D printing for base forms, then adding hand finishes for uniqueness
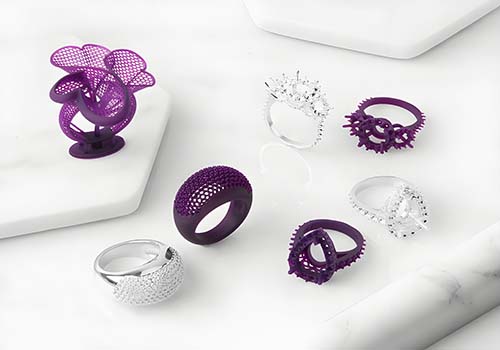
1.3, Types of Jewelry That Can Be Printed
1.4,Material Types: Standard Resin vs. Castable Resin
Material Types: Standard Resin vs. Castable Resin
Choosing the right resin for 3D printed jewelry production
1. Standard Resin
Definition:
Standard resin is a general-purpose photopolymer used in 3D printing for prototyping and visual models.
Best For:
Non-casting prototypes
Design previews
Fitting tests
Master models for mold duplication
Key Features:
Good surface finish
High dimensional accuracy
Available in multiple colors (gray, white, transparent, etc.)
Not suitable for direct burnout casting
Limitations:
Cannot be used in lost-wax casting
Leaves ash/residue during high-heat burnout
More brittle than castable resins
Use Cases:
Jewelry design validation
Presentation samples
Mold master for rubber or silicone duplication
2. Castable Resin
Definition:
Castable resin is specially formulated for clean burnout during lost-wax casting, leaving minimal ash or residue.
Best For:
Direct casting of gold, silver, platinum, bronze, etc.
High-precision jewelry molds
Custom and production-ready parts
Key Features:
Burns out cleanly (ash-free)
Compatible with investment casting
Excellent for micro-detail and smooth surfaces
Often has a wax-like feel or color (purple, green, blue)
Considerations:
Slightly more expensive than standard resin
Requires proper curing before burnout
Specific burnout schedule must be followed (850–900°C max)
Use Cases:
Rings, pendants, earrings, and other final-use jewelry parts
Small-batch production
One-off custom commissions
Comparison Summary:
| Feature | Standard Resin | Castable Resin |
|---|---|---|
| Burnout Compatibility | ❌ Not suitable | ✅ Designed for lost-wax casting |
| Use Purpose | Prototyping, fit checks | Final production parts |
| Surface Finish | Smooth | Very smooth (suitable for casting) |
| Cost | Lower | Slightly higher |
| Ash Residue | High (not recommended for kilns) | Near-zero (clean burnout) |
Conclusion: Which One Should You Choose?
Use Standard Resin if you need to test or showcase your jewelry design before casting.
Use Castable Resin if you’re going directly to metal casting — it’s the industry standard for precious metal production.
Casting Integration: How to Use Prints for Metal Casting
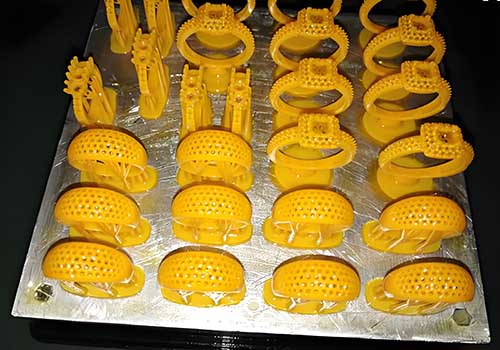
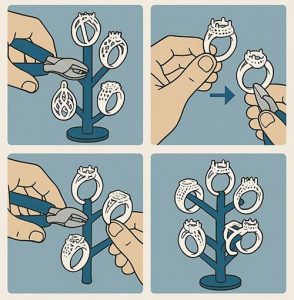
2.1, How to Assemble Printed Models into a Casting Tree
For Resin 3D Printed Jewelry Patterns
Materials Needed:
Fully cured resin-printed jewelry models (preferably castable resin)
Wax sprues (2–4 mm diameter)
Wax pen or heated spatula
Main wax trunk (central sprue)
Rubber sprue base or casting flask base
Tweezers, gloves, and alcohol wipes
Step-by-Step Assembly Process
1. Inspect and Clean Printed Models
Ensure all models are fully UV cured
Clean them gently with alcohol to remove dust or residue
Choose appropriate attachment points (usually flat, thick areas)
2. Prepare the Central Sprue (Tree Trunk)
Use a straight wax rod as the main trunk
Cut it to match the height of the flask, leaving space at the top and bottom
Fix it upright into a rubber sprue base
3. Attach Wax Sprues to Each Model
Use a wax pen or heated metal spatula to melt and weld one end of a wax sprue to the model
Keep sprues short and direct—angled 30–45° upwards is ideal
Avoid sharp bends or long, unsupported sprue paths
4. Assemble the Tree Structure
Attach models around the main trunk, starting from the bottom and spiraling upward
Ensure even spacing to allow investment to flow freely between parts
Avoid crowding—leave 2–3 mm between models
Keep weight balanced to avoid leaning during casting
5. Final Check and Stability
Gently tap the tree—nothing should wobble
Double-check for:
Weak connections
Colliding models
Unclean joints
Secure the trunk tightly into the base for a vertical hold during investment
Best Practices & Tips
Use thicker sprues (3–4 mm) for heavier models to improve metal flow
Position heavier pieces at the bottom of the tree
Label tree levels if printing multiple designs for tracking
Keep the tree as compact and balanced as possible
Minimize the total number of connections to reduce metal waste
What Comes Next?
Once your casting tree is assembled:
Place it in a metal flask
Pour investment plaster to fully cover the tree
Dry and burn out in a kiln to remove the resin
Pour molten metal (gold, silver, etc.) into the cavity
2.2, Investment Molding & Vacuum Mixing Process
How to properly embed resin-printed models in investment material for lost-wax casting
Purpose:
Investment molding is the process of surrounding your resin casting tree with a heat-resistant plaster (called investment) that will form a mold cavity after burnout. Vacuum mixing removes air bubbles to ensure a smooth, detailed mold surface.
Materials & Tools Needed:
Fully assembled casting tree
Casting flask (metal cylinder)
Investment powder (gypsum-based, for high-temp casting)
Deionized/distilled water
Vacuum investment mixer
Rubber sprue base and flask ring
Scale and mixing container
Timer, gloves, spatula
Step-by-Step Procedure:
1. Seal the Flask to the Rubber Base
Insert your wax/resin tree into the rubber sprue base.
Fit the casting flask securely on top.
Make sure the seal is tight to prevent leaks when pouring investment.
2. Measure and Mix the Investment
Follow the ratio recommended by the investment powder manufacturer (e.g., 100g powder : 35–40ml water)
Pour water first, then gradually add the powder while stirring
Use a vacuum mixer to blend for 3–5 minutes under vacuum.
This removes bubbles that could cause mold defects.
3. Pour Investment into the Flask
After mixing, gently pour the investment into the flask from the side (not directly on the model)
Pour in a slow, steady stream to avoid trapping air
Fill to about 1–2 cm below the top of the flask
4. Vacuum De-Bubbling (Optional but Recommended)
Place the filled flask under a bell jar vacuum chamber for another 60–90 seconds
Watch for bubbles rising to the surface and collapsing
This step ensures a bubble-free surface around delicate jewelry features
5. Initial Set & Curing
Let the investment sit undisturbed for at least 60 minutes at room temperature
Avoid vibration or moving the flask during this stage
After curing, the mold is ready for burnout in a kiln
Tips for Best Results:
Use deionized water to avoid chemical reactions that can weaken the investment
Don’t over-mix or introduce excessive air during manual mixing
Use a timer for consistency between batches
Ensure room temperature is stable (~20–25°C) to avoid premature setting
Next Step:
Once the investment is cured, proceed to the burnout cycle to remove the resin and prepare the mold cavity for metal casting.
2.3, Burnout Schedule (Temperature Curve)
Recommended temperature curve for complete resin elimination without ash or damage to the mold
Purpose:
The burnout process gradually heats the investment mold to vaporize and eliminate the resin 3D printed model, leaving behind a clean, detailed cavity for molten metal.
Standard Burnout Temperature Curve (12–14 Hours)
| Stage | Temperature | Duration | Notes |
|---|---|---|---|
| 1. Drying Phase | 150°C (300°F) | 2 hrs | Slowly dries out residual moisture in investment |
| 2. Transition | Ramp up to 350°C (660°F) | 2 hrs | Begins resin softening & thermal expansion |
| 3. Resin Burnout | Ramp up to 700–750°C (1290–1380°F) | 3–4 hrs | Fully burns out the resin (critical stage) |
| 4. Soak | Hold at 730–780°C (1345–1435°F) | 2 hrs | Ensures all resin and ash are eliminated |
| 5. Cooldown | Reduce to casting temp (~500–550°C / 930–1020°F) | 2 hrs | Stabilize mold before metal pouring |
Best Practices:
Ventilation is crucial: Always use a burnout kiln with a good fume exhaust system (resin produces vapor and gas).
Avoid stacking flasks too tightly—leave space for airflow between molds.
Preheat the kiln before inserting flasks to avoid condensation.
Ensure resin is completely cured before burnout, or it may leave residue.
Use an ash-free castable resin designed for lost-wax/resin casting.
Optional Fast Burnout (For Emergency Use Only – Not Recommended for High Detail)**
| Temp | Hold Time |
|---|---|
| 150°C → 350°C → 750°C | Ramp over 3 hours, hold at 750°C for 3 hours |
| Cool to 550°C for casting |
This should only be used when time is constrained, and detail loss is acceptable.
After Burnout:
Once cooled to the appropriate casting temperature, proceed to metal melting and casting (gold, silver, bronze, etc.).
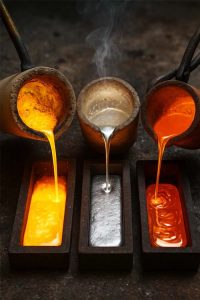
2.4, Metal Melting & Casting: Gold, Silver, Copper
Purpose:
To pour molten metal into the investment mold cavity (created by burning out the resin model), resulting in a detailed jewelry piece in gold, silver, or copper.
Required Equipment & Materials:
Fully burnt-out investment mold (still hot, 500–550°C)
Induction melting furnace or torch/tilt furnace
Crucible (graphite or ceramic)
Casting metal:
Gold (Yellow/White/Rose)
Silver (Sterling or Fine)
Copper
Casting machine:
Vacuum casting machine
Centrifugal casting machine
Protective gear (gloves, shield, apron, tongs)
Step-by-Step Melting & Casting Process
1. Prepare the Mold for Casting
After burnout, let the flask cool to casting temperature (typically 500–550°C)
Do not let the flask reach room temp unless you’re doing cold mold casting (not typical for resin casting)
Keep the flask in the kiln at casting temperature until ready
2. Melt the Metal
| Metal | Melting Point |
|---|---|
| Gold (24K) | ~1064°C (1947°F) |
| Silver | ~961°C (1762°F) |
| Copper | ~1085°C (1985°F) |
Place the required amount of metal in the clean crucible
Use an induction furnace for speed and even melting
Add flux (borax or commercial metal flux) to prevent oxidation and improve flow
Stir gently if needed with a carbon rod for uniformity
3. Casting the Metal
Once molten and fluid, pour the metal into the flask using one of the two methods:
a) Vacuum Casting
Place the flask into the vacuum casting chamber
Engage the vacuum to draw the molten metal into the mold cavity
Ideal for high-detail parts and minimizing porosity
b) Centrifugal Casting
Load the mold and crucible into the spinning arm
Heat until the metal is fully molten
Release the arm; centrifugal force forces metal into the mold
Suitable for small to medium batch sizes
4. Cooling & Mold Breakout
Let the metal-filled mold cool for 30–60 minutes
Quench in water (optional based on investment type)
Carefully break the mold using water pressure or manual tools
Retrieve the raw metal cast jewelry tree
Post-Casting Steps (Overview):
Cut off the sprues
Surface filing and cleaning
Polishing and buffing
Electroplating (if required)
Stone setting (optional)
Tips for Better Casting Results:
Use fresh or high-quality recycled metal to avoid impurities
Preheat crucible to reduce thermal shock
Avoid over-melting the metal (risk of oxidation or evaporation)
Ensure proper ventilation and safety at all times
2.5, Post-Casting Finishing
1. Sprue Removal
Tool: Jeweler’s saw, rotary tool, or cutting disc
Cut off the casting sprues (branches from the casting tree) as close to the part as possible
Take care not to damage the surface of the piece
Leave a small nub for further grinding and smoothing
2. Surface Grinding & Filing
Tool: Needle files, carbide burrs, sanding wheels
Smooth the area where sprues were removed
Eliminate surface irregularities, visible layer lines (if any), or minor casting defects
Start with coarser abrasives and progress to finer ones
3. Pre-Polishing
Tool: Rubber wheels, sanding drums, or abrasive papers (400–1000 grit)
Refine the surface evenly to prepare for final polishing
At this stage, you aim to remove any scratches or texture from previous steps
4. Polishing
Tool: Buffing motor with polishing compounds (Tripoli, Rouge, etc.)
Use a two-step process:
Tripoli (brown compound) for cutting and smoothing
Rouge (red compound) for high-gloss finish
Apply gentle, even pressure to avoid losing sharp detail
5. Ultrasonic Cleaning (Optional)
Tool: Ultrasonic cleaner with jewelry solution
Removes polishing compound and micro-debris from crevices
Enhances cleanliness and sparkle, especially before plating or stone setting
6. Electroplating (Optional)
Use Case: Gold vermeil, rhodium finish, or anti-tarnish coating
Apply a thin layer of metal (e.g., rhodium over silver, gold flash plating over copper)
Enhances corrosion resistance, appearance, and skin compatibility
7. Stone Setting (Optional)
Tool: Prong pushers, burnishers, microscopes for fine detail
Set gemstones manually or with pneumatic tools
Secure stones based on design (prong, bezel, pavé, etc.)
8. Final Inspection & Packaging
Inspect the piece for symmetry, polish quality, and structural integrity
Clean fingerprints or polishing residue
Package in a box or display case for delivery or sale
Pro Tips:
Always wear a dust mask during polishing (metal dust is hazardous)
Use appropriate polishing compound for the metal type
Avoid polishing too hard on filigree or fine detail to prevent losing features
For high-volume production, consider using tumbling machines for initial polish
Summary:
Post-casting finishing turns a raw metal piece into a refined, high-value jewelry product, ready for customer presentation. Each step adds value—precision and care here reflect directly in the quality and price of the final piece.
Applications & Target Users: Who Is This For?
3.1, Small Jewelry Studios
For tiny jewellery studios looking to increase creative possibilities, save expenses, and simplify production, resin 3D printing has revolutionised the industry. In contrast to conventional wax carving, which requires a great deal of work and expert workmanship, 3D printing enables designers to precisely manufacture intricate, personalised items straight from digital CAD files. Detailed rings, earrings, pendants, and charms may now be made in-house by small studios without the need for outsourcing or mold-making. In addition to significantly reducing lead times, the ability to print castable resin models that are compatible with lost-wax casting allows craftsmen complete control over the whole process, from design to metal casting. Resin 3D printers enable independent jewellers and boutique studios to increase their creativity and efficiency, meet customer demands more quickly, and compete more successfully in the custom jewellery market because they reduce material waste, eliminate the need for costly tooling, and enable quick iteration or customisation of designs.
3.2, Custom Jewelry Brands
Resin 3D printing provides unparalleled design, speed, and personalisation flexibility for custom jewellery manufacturers, perfectly complementing the fundamental principles of customised crafting. Brands can now convert consumer concepts into high-resolution 3D printed models in a matter of hours rather than depending on antiquated hand-carved wax moulds, facilitating quicker prototyping, client approvals, and final manufacturing. Without the high expenses or constraints of mold-making, designers may create one-off pieces, intricate geometries, and ultra-fine details using castable resin, which is ideal for lost-wax casting. Resin 3D printing guarantees accuracy, consistency, and creative freedom whether creating personalised name necklaces, unique engagement rings, or limited-edition collections. While keeping control over quality and manufacturing schedules, it enables organisations to provide quick design iterations, adapt to changing trends, and create really one-of-a-kind items that tell distinct customer stories.
3.3, Educational Institutions (Jewelry Design Programs)
Resin 3D printing is an essential tool for educational institutions that provide jewellery design programmes because it connects traditional craftsmanship with contemporary digital production. Students may turn their CAD drawings into physical prototypes and have practical experience with technologies that are relevant to the business by including resin 3D printers into the curriculum. In addition to improving their comprehension of form, proportion, and utility, this method gets students ready for lost-wax casting and other real-world manufacturing processes. Students are able to accomplish the whole design-to-finish cycle by using castable resin to create intricate rings, pendants, and earrings that are appropriate for metal casting. In contrast to the years-long process of mastering conventional wax carving, 3D printing allows novices to rapidly envision and improve their works, encouraging confidence and inventiveness. Schools that have resin 3D printing provide students a competitive advantage as the jewellery industry continues to use digital technologies. This ensures that students graduate with the abilities necessary to innovate in both bespoke design and commercial production situations.
3.4, Craft Brands & Independent Designers
Resin 3D printing gives independent designers and handmade jewellery firms more creative freedom, manufacturing control, and market flexibility. Whether it’s a small-batch earring line, a personalised pendant, or a one-of-a-kind sculpture ring, designers may create complex, unique items straight from their digital designs without the need for extensive production infrastructure. Resin printers, particularly those that use castable resins, enable the production of intricate, casting-ready models that work in unison with conventional lost-wax techniques. This eliminates the time and expense limits associated with hand carving or mould fabrication, allowing designers to rapidly test, alter, and refine their designs. Craft companies may adapt more quickly to consumer input or design trends while maintaining complete control over quality and uniqueness by managing prototype and manufacturing in-house. Independent designers are able to grow at their own speed by producing distinctive, fine jewellery that expresses their own style and narrative, whether they want to sell online, at art fairs, or in boutiques.