


Basic Understanding: What is a 20 Ton Hydraulic Press?
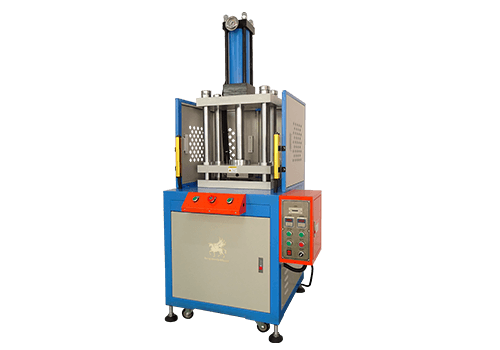
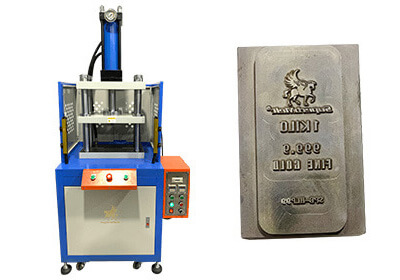
The 20 Ton Hydraulic Press serves as a core piece of equipment in medium-to-low pressure processing, meeting both the precision pressing requirements of industrial production and the specialized needs of sectors such as precious metals, jewelry, and electronics. Among them, the Superbmelt 20 Ton Hydraulic Press, optimized for precious metal processing, has become the preferred choice for gold/silver bar production and multi-industry stamping applications.
This guide will comprehensively explain the value and usage of the 20 Ton Hydraulic Press, covering basic understanding, equipment advantages, practical applications, model selection, and maintenance.
1.1, Core Definition
A 20 Ton Hydraulic Press refers to a hydraulic transmission device with a maximum rated pressure of 20 tons (200kN). Based on Pascal’s Law (the pressure applied to a confined fluid is transmitted equally), the hydraulic system converts electrical energy into hydraulic energy, then into mechanical energy, finally applying stable pressure to the workpiece through a ram or mold to perform extrusion, bending, punching, forming, and embossing.
Simply put, it is like a “precise mechanical arm” — the pressure can be accurately adjusted from a few tons up to 20 tons, ensuring it neither underperforms nor damages the workpiece due to overload. It offers a balance of practicality, flexibility, and cost-effectiveness, positioned between manual hydraulic presses (≤5 tons, low pressure) and large presses (≥50 tons, bulky and expensive).
1.2, Core Working Principle
Operation involves three key steps:
Power Input: Electrical to Hydraulic Energy
Equipped with a hydraulic pump (gear or vane pump; the SPB-20TS uses a high-efficiency gear pump), the motor drives the pump, pressurizing the oil into high-pressure hydraulic oil (up to 20MPa, equal to 20 tons) and delivering it to the hydraulic cylinder.Pressure Transmission: Hydraulic to Mechanical Energy
The high-pressure oil enters the hydraulic cylinder, pushing the piston rod up and down (direction controlled by a reversing valve). The piston rod connects to the ram or mold, converting hydraulic energy into linear mechanical force applied to the workpiece.Precision Control: Adjustable Pressure and Stroke
Pressure control: Sensors and relief valves ensure stable output; excess oil flows back when the preset value (e.g., 5T, 15T) is reached.
Stroke control: Travel switches limit movement (e.g., 50mm, 200mm); the ram stops at the set distance for consistency.

1.3, Core Structure and Performance Impact
| Component | Core Function | User Benefits |
|---|---|---|
| Hydraulic System | Supplies high-pressure oil, transfers power | Pump quality determines lifespan (SPB-20TS pump runs 8 hours continuously without failure); oil tank capacity affects operating time |
| Hydraulic Cylinder | Converts hydraulic to mechanical force | Larger bore = more stable pressure; chrome-plated piston rod resists wear and rust |
| Ram & Worktable | Apply pressure to workpiece | Interchangeable rams for different tasks; 500×400mm table on SPB-20TS fits medium-sized parts |
| Control System | Sets pressure/stroke, controls operation | Touchscreen + PLC (SPB-20TS), supports parameter memory for repeat jobs |
| Safety Devices | Prevents operator injury | Dual-hand start & emergency stop reduce risks |
| Machine Frame | Supports system under load | Four-column three-plate or C-type; heavy-duty steel prevents deformation |
Equipment Advantages: Why Choose a 20 Ton Hydraulic Press
For beginners, the “operational complexity” of industrial equipment is often the biggest barrier—concerns about incorrect parameters, missed steps leading to processing failures, or even equipment damage. However, the Superbmelt 20 Ton Hydraulic Press, with its fully automated workflow design and beginner-friendly optimizations, completely eliminates this concern. Even inexperienced operators can independently complete precious metal bar stamping and small metal part forming tasks within just 30 minutes.
2.1, Fully Automated Operation — Beginner-Friendly
The core advantage of the Superbmelt 20 Ton Hydraulic Press lies in “simplifying complex processing into automated steps.” From parameter setup to stamping completion, there is no need for manual pressure adjustment or ram control. Beginners simply follow the workflow to consistently produce qualified products.
Step 1: Parameter Setup — “Preset Memory + Intuitive Touch Control,” No Technical Knowledge Needed
No need to understand hydraulic principles: Simply select or input parameters based on processing needs, and the machine automatically matches the optimal solution.
One-click recall of common parameters: For frequent applications like gold bar stamping or silver bar forming, the press comes with 10 preset parameter groups (e.g., “5mm gold bar – 8 tons – 80mm stroke” or “10mm silver bar – 15 tons – 120mm stroke”). Beginners just tap the touchscreen to select the required mode without repeated adjustments.
Foolproof custom input: For special-sized workpieces (e.g., non-standard thickness metal parts), operators simply enter “target pressure (5–20 tons)” and “stroke (100–250mm).” The machine automatically calculates and matches the lifting speed (default: 68mm/min, no manual adjustment needed). A parameter range warning (e.g., pressure cannot exceed 20 tons) prevents mistakes.
Visual confirmation: Once input is complete, a pop-up summary (e.g., “Pressure: 8 tons, Stroke: 80mm, Speed: 68mm/min”) ensures correctness before starting, reducing errors.
Step 2: Workpiece Processing — “One-Touch Start + Automatic Completion,” No Supervision Required
No manual ram control: After pressing “Start,” the ram automatically descends at 68mm/min, applies the preset pressure (e.g., 8 tons), holds for 2–3 seconds for a clear imprint, then ascends back at the same speed. No need to manually press “down,” “stop,” or “up.”
No real-time monitoring: Built-in safety features include “automatic stop at target stroke” and “overload protection.” If the ram reaches the set stroke (e.g., 80mm) or pressure exceeds the 20-ton limit, the machine halts immediately. Operators can prepare the next batch without constant supervision.
Batch processing made easy: Place multiple workpieces (e.g., 2–3 pcs of 10g gold bars), start the machine, and it will continuously stamp them. A soft alert sound signals when each piece is done, so the operator simply swaps the workpieces without re-entering parameters.
Step 3: Cleaning & Shutdown — “Simplified Process + Clear Guidance,” No Maintenance Skills Needed
Clear cleaning steps: The control panel includes a “Post-Operation Cleaning Guide” with illustrated steps: wipe the worktable with a soft cloth → clean molds with alcohol → check hydraulic oil level. Easy to follow, ensuring nothing is overlooked.
No complicated maintenance: Daily shutdown requires no lubrication or mechanical adjustments. Just check that “hydraulic oil is between MIN–MAX” and “cooling water is sufficient.” If oil is low, a visible scale on the tank makes it simple—just add 46# anti-wear hydraulic oil to the marked line, no measuring required.
Direct fault prompts: If issues like oil leakage or loose molds occur, the screen displays clear messages such as “Oil leak detected, check seal ring” or “Loose mold screw, tighten here.” The interface highlights exact inspection points (e.g., “seal at cylinder base,” “left-side mold screw”), so beginners can handle preliminary checks or directly contact after-sales service without hunting for the fault.
2.2, Precision and Consistency
In precious metal processing (such as gold/silver bar stamping) and electronic component forming, precision determines whether products meet standards (e.g., clear purity markings, correct dimensions), while consistency ensures that every piece in mass production is equally qualified. The Superbmelt 20 Ton Hydraulic Press (SPB-20TS) combines advanced structural design with intelligent control to keep pressure deviations within ±2% and stroke deviations within ≤0.1mm. Even beginners can achieve results where “every product is as precise as the first one.”
High Precision: From Structure to Control, Accuracy in Every Stroke
The precision of the Superbmelt 20 Ton Hydraulic Press is not the result of a single feature but of an entire chain of design improvements in pressure delivery, stroke control, and workpiece positioning—ideal for high-value materials like precious metals.
1. Pressure Accuracy: ±2% Tolerance for Different Materials
Real-time pressure monitoring: Equipped with a 0.5-grade precision pressure sensor, the system tracks pressure fluctuations in real time. If the deviation exceeds ±1%, the control system adjusts oil flow via a relief valve to restore accuracy (e.g., at 8 tons, actual output remains within 7.84–8.16 tons).
Soft-metal protection: When working with pure gold (9999), pure silver, or other soft metals, the system activates a “pressure buffer mode.” Pressure increases more gradually (0.2 tons/sec vs. the usual 0.5 tons/sec) to prevent localized deformation or cracking, while still maintaining overall accuracy. For example, stamping a “9999” hallmark is guaranteed at exactly 8 tons without missing strokes.
Visual pressure feedback: The touchscreen displays the real-time pressure curve. If pressure drifts, a pop-up alert—e.g., “Abnormal pressure, check workpiece alignment”—helps operators quickly correct issues.
2. Stroke Accuracy: ≤0.1mm Deviation for Uniform Dimensions
Self-lubricating linear guides: The ram moves on four-axis linear guide sleeves instead of standard rails. With an ultra-low friction coefficient (≤0.001), this ensures stable movement with ≤0.1mm stroke deviation (e.g., set stroke 80mm, actual range 79.9–80.1mm).
Photoelectric positioning: Dual optical limit switches instantly stop the ram at the set stroke, preventing overshoot caused by inertia (e.g., no 80.2mm drift on an 80mm stroke).
Adaptability across thicknesses: Whether forming thin 2mm gold bars (50mm stroke) or thicker 10mm silver bars (120mm stroke), stroke precision remains ≤0.1mm across the adjustable 100–250mm range.
3. Workpiece Positioning: Mold Alignment + Worktable Design
Quick mold alignment: Both ram and table feature 8mm locating pins (tolerance ≤0.02mm). Molds lock in place instantly with ≤0.5mm misalignment, eliminating repeated manual adjustments.
Anti-slip + alignment grid: The table surface has a soft anti-slip rubber mat and a 1mm precision cross grid, helping operators quickly align workpieces at the center.
Adjustable table height: The 850mm worktable (ergonomic standard) can be adjusted ±50mm, allowing clear alignment of small or medium-sized parts at eye level, reducing operator errors from misplacement.
High Consistency: Ensuring Every Piece Matches the First
For enterprises, consistency is even more critical than one-time accuracy. If 10 out of 100 bars deviate, the cost of screening, reworking, or scrapping rises significantly. The Superbmelt 20 Ton Hydraulic Press prevents this with locked parameters, automated workflows, and wear-compensation features.
1. Parameter Locking: Preventing Errors During Batch Runs
Batch mode lock: Once batch processing is enabled, parameters for pressure, stroke, and speed are locked. Only authorized personnel with a password can change them, preventing accidental parameter shifts.
Parameter memory & recall: If producing 1,000 gold bars, the machine remembers the initial settings (e.g., 8 tons, 80mm stroke). After a shift change or restart, operators can instantly recall saved parameters, ensuring identical output across all operators.
2.3, Efficiency and Energy-Saving
The SPB-20TS operates with a ram speed of 68mm/min, completing each press cycle (including workpiece placement and removal) in just 30–40 seconds. This allows for 80–100 gold/silver bar stampings per hour, achieving an efficiency 4–5 times higher than traditional manual hydraulic presses.
Energy Efficiency
- With a motor power of only 3.75kW, the machine consumes about 30 kWh during 8 hours of continuous operation, significantly lower than similar equipment rated at 5–7kW. This translates to monthly savings of 300–500 RMB (≈41–68 USD) in electricity costs.
Low Noise & Low Maintenance
- The press operates at ≤65 decibels (comparable to normal conversation), ensuring a quieter workshop environment. Its core components are self-lubricating, keeping annual maintenance costs as low as 200–300 RMB (≈27–41 USD) (mainly for replacing filters and seals).
2.4, Versatility Across Materials and Industries
One of the biggest limitations of industrial equipment is that it often can only process specific materials or serve a single industry. This forces companies to purchase multiple machines, driving up costs. The Superbmelt 20 Ton Hydraulic Press (SPB-20TS) solves this pain point with wide pressure adjustment, interchangeable die design, and material-protection functions. It can easily handle metals such as gold, silver, copper, and aluminum, while also serving industries like precious metal processing, jewelry manufacturing, electronics, and automotive parts—truly achieving “one machine, multiple applications.”
Multi-Material Adaptability: From Soft Precious Metals to Hard Industrial Metals
Different materials vary greatly in hardness, melting point, and ductility. For example, pure gold (9999) is soft and easy to deform, while stainless steel has high hardness and requires strong pressure. The SPB-20TS offers adjustable pressure, die compatibility, and protective features to ensure each material has an optimized processing solution—eliminating failures caused by material characteristics.
1. Soft Precious Metals: Gold, Silver, Platinum — Precise Stamping Without Deformation
Pressure Settings: For pure gold (9999) bar stamping, use 5–8 tons (avoids cracks from excessive pressure); for silver shaping, use 8–12 tons; for platinum, 12–15 tons (harder than gold/silver). All are within the 5–20 ton adjustable range.
Die Protection: Equipped with a 2mm silicone soft pad between die and workpiece, preventing scratches and ensuring even pressure. This results in smoother, clearer “9999” purity markings.
Case Study: A jewelry factory used the press to shape 18K gold pendants. At 10 tons and 60mm stroke, the pattern was sharp, the metal undamaged, and efficiency increased 5x compared to manual stamping.
2. Standard Industrial Metals: Copper, Aluminum, Iron — Efficient for Mass Production
Copper (35–45HV): For connectors, use 8–10 tons with titanium-coated stamping dies. Achieves 200 connectors/hour with >99.5% pass rate.
Aluminum (25–35HV): Set 6–8 tons. For auto brackets, 80mm stroke achieves precise 90° bends with ≤1° deviation, avoiding cracks.
Iron (100–150HV): For 2mm sheet punching, use 15–18 tons with high-speed dies. Produces 300 holes/hour (5mm diameter) with burr-free edges.
3. Special Materials: Stainless Steel, Titanium Alloy — Stable High Pressure for Precision
Stainless Steel (150–200HV): For shielding covers, use 18–20 tons and 100mm stroke. Logo stamping achieves 0.15mm depth with ≤0.02mm deviation.
Titanium Alloy (200–300HV): For medical parts, use 15–18 tons with HSS dies. Shaping achieves ≤0.05mm tolerance and Ra≤0.8μm surface finish.
Cross-Industry Applications: From Precious Metals to Automotive Parts
The SPB-20TS adapts to vastly different industry needs through modular functionality and adjustable parameters, making it a universal processing solution.
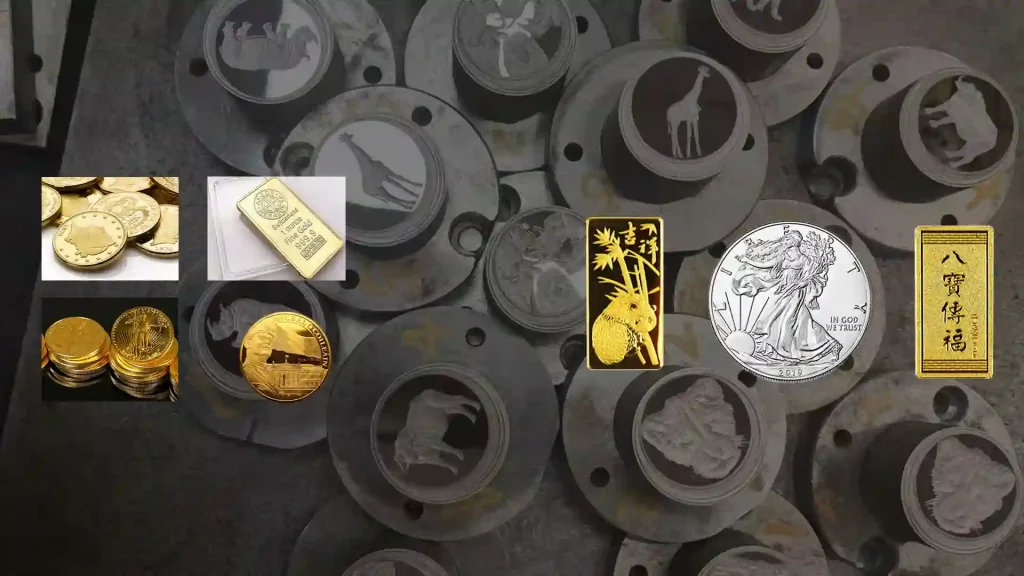
1. Precious Metals: Core Equipment for Bars & Anti-Counterfeit Stamping
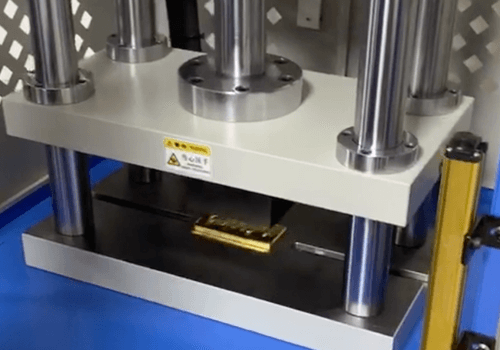
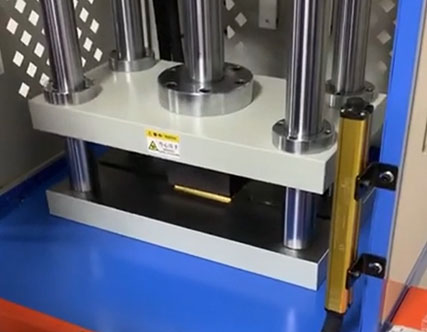
Bar Forming: Standardizes gold/silver bars (e.g., 100g bar = 30×15×2.2mm). 500×400mm worktable holds 2–3 ingots, producing 80–100/hour with ≤0.05mm tolerance.
Anti-Counterfeit Markings: Stamps purity (9999), logo, and serial numbers at 8–10 tons, 0.1–0.2mm deep, with clear, durable markings. One refinery doubled counterfeit detection accuracy using this machine.
2. Jewelry Manufacturing: From Accessories to Gem Setting
Sheet Patterning: 0.5mm silver sheet pressed at 5–6 tons, 50mm stroke. Floral patterns come out sharp, deformation-free, and 10x faster than hand-hammering.
Accessory Assembly: 0.8mm gold stud pin pressed into base at 3–4 tons, achieving 50N strength (standard ≥30N).
Gem Setting: Diamonds secured with 4–5 tons pressure. Results: no loosening, 100% success rate in 1,000 rings at one factory.
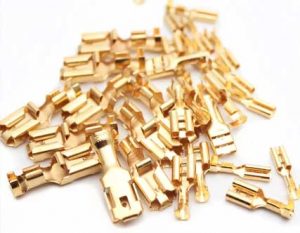
3. Electronics: Precision Assembly & Marking
Connector Pin Assembly: 0.5mm copper pins pressed at 5–7 tons, 40mm stroke, ≤±2% error. Achieves ≥20N pull force (standard ≥15N).
Micro Marking: Aluminum housings (20×10×5mm) stamped at 3–5 tons with 1mm micro-character dies. Serial numbers remain sharp without deforming parts.
4. Automotive & Hardware: Mass Production Efficiency
Auto Parts Bending: 1mm iron bracket bent at 12–15 tons, 70mm stroke, ≤1° deviation. Produces 150/hour, 3x faster than manual.
Hardware Punching: 2mm aluminum plate punched with 8mm holes at 15–18 tons, die lifespan ≥50,000 cycles. Produces 300/hour, burr-free, cutting costs by 40%.
5. Medical & Aerospace: High-Precision Standards
Medical Tools: Titanium tweezers processed at 15–18 tons, 60mm stroke. Tolerance ≤0.05mm, Ra≤0.8μm, meeting biocompatibility standards.
Aerospace Brackets: Aluminum alloy brackets shaped at 10–12 tons with lightweight dies. Final weight deviation ≤0.1g, meeting aerospace lightweighting standards.
Core Design Features Enabling Multi-Material, Multi-Industry Versatility
Wide Pressure Range (5–20 tons):
Low pressure (5–10 tons) prevents deformation of soft metals, while high pressure (15–20 tons) ensures effective processing of hard metals. Settings adjusted easily via touchscreen.Quick-Change Dies (10 minutes):
Stamping: logo/character dies for bars or electronic housings.
Shaping: bending/forming dies for pendants or auto parts.
Punching: hole dies for hardware or aluminum sheets.
Dies align automatically with positioning pins; no special tools needed.
Material Protection Functions:
Soft metals (gold/silver): Pressure ramping mode (0.2 tons/sec) avoids cracking.
Oxidation-prone metals (aluminum/copper): Anti-oxidation die coating reduces surface damage.
Precision materials (titanium/stainless steel): High-accuracy stroke control (≤0.1mm deviation).
2.5, Competitive Advantages
- vs. manual presses: stable force, 4–5× efficiency.
- vs. punch presses: multi-tasking, safer, adjustable stroke.
- vs. large presses: compact (1.5m²), lower cost, ideal for SMEs.
Industry Applications
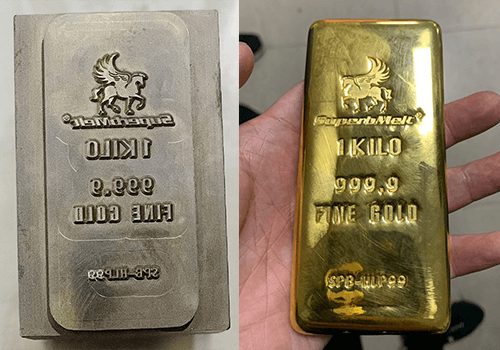
In gold/silver bar production, “standard dimensions,” “clear markings,” and “zero loss” are the core requirements — dimensional deviations affect value, unclear markings increase counterfeit risks, and processing losses directly raise costs. The Superbmelt 20 Ton Hydraulic Press, specially optimized for precious metals, perfectly addresses these challenges. It enables precise shaping of gold/silver bars while imprinting anti-counterfeit markings, making it a key processing solution for precious metal refineries, jewelry manufacturers, and financial institutions.
3.1, Precious Metals (Gold/Silver Bars)
The dimensions of gold/silver bars (length, width, thickness) must comply with industry standards (for example, a 100g gold bar typically measures around 31×15×2.3mm), and the surface must be flat without protrusions or scratches, to avoid appearance defects that could affect market acceptance. The Superbmelt 20 Ton Hydraulic Press ensures compliant shaping through “precise pressure control + shaping molds + soft protection.”
1. Adaptable to different gold/silver bar weights: from 10g to 200g, dimensional deviation ≤0.05mm
The equipment is designed for common gold/silver bar weights (10g, 20g, 50g, 100g, 200g). By adjusting parameters and replacing molds, precise shaping can be achieved, with dimensional deviations for all weights controlled within ≤0.05mm, meeting precious metal exchange standards:
Lightweight bars (10–50g): e.g., 20g gold bar (standard size 22×10×2.1mm). Set pressure: 8–10 tons, stroke: 60–80mm, using a “single stamping shaping” method — place the cooled gold blank into the “20g gold bar dedicated mold,” start the press, and the ram descends at 68mm/min, applying stable pressure. After shaping, length, width, and thickness deviations are all ≤0.05mm, and surface flatness is ≤0.03mm (no protrusions or depressions).
Medium-weight bars (100–200g): e.g., 100g silver bar (standard size 30×15×2.2mm). Due to the thicker silver blank (~5mm), a “two-step stamping shaping” is used — first, pre-press at 8 tons to roughly fit the mold, then fine-press at 12–15 tons to ensure precise dimensions and a flat surface. Stroke: 100–120mm, preventing cracks from a single high-pressure press.
2. Surface protection: preventing scratches and material loss, safeguarding precious metal value
Gold and silver are soft; direct contact with hard molds during processing can cause scratches or metal adhesion, resulting in loss (even 0.1g loss increases cost for gold bars). The equipment uses a dual-protection design to ensure zero-loss processing:
Soft mold padding: A 2mm thick silicone pad (high-temperature resistant, non-stick) is applied inside the shaping mold. The gold/silver blank is isolated from the mold by the pad, preventing scratches. The elasticity of the pad also ensures uniform pressure transmission, reducing local depressions.
Burr-free processing: Molds are mirror-polished (surface roughness Ra ≤0.8μm). After stamping, the edges of the gold/silver bars have no burrs, eliminating the need for post-processing polishing (traditional manual shaping can cause 0.2–0.5g metal loss). One precious metal refinery reported that after using this equipment, gold bar processing loss dropped from 0.3% to 0.05%.
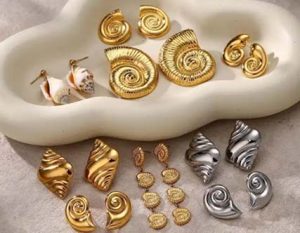
3.2, Jewelry Manufacturing
The foundational step in jewelry manufacturing is “metal shaping” — pressing precious metal wires/blanks such as gold, silver, and platinum into thin sheets, patterned pieces, or 3D components (e.g., pendant bodies, ring settings), requiring clear details, no deformation, and smooth surfaces. The Superbmelt 20 Ton Hydraulic Press meets these strict shaping requirements through “low-pressure slow pressing + precise molds.”
1. Pressing precious metal sheets: uniform thickness, no stretching deformation
When making flat jewelry such as pendants or brooches, precious metal wire needs to be pressed into uniform sheets of 0.1–1mm thickness. Traditional hand hammering often causes uneven thickness (thin edges, thick center), whereas the equipment achieves high-precision pressing:
Material & parameter adaptation: Processing 18K gold (hardness 35HV) sheets of 0.5mm thickness, set pressure 5–6 tons, stroke 40–50mm, using a “single slow press” — the ram descends at 68mm/min, applying pressure gradually upon contact with the gold blank to avoid stretching deformation from sudden force.
Thickness precision guarantee: With precise stroke control (deviation ≤0.1mm), the pressed gold sheet thickness deviation is ≤0.02mm (e.g., 0.5mm set → actual 0.48–0.52mm), eliminating the need for further polishing and ready for cutting into shapes, reducing precious metal loss by 0.2% compared to hand hammering.
Surface protection: A 0.5mm wool felt pad is applied inside the mold to prevent scratches from direct metal-mold contact. The pressed gold sheet achieves a surface smoothness of Ra ≤0.4μm, meeting jewelry mirror-finish requirements.
2. Pattern imprinting: clear details, faithful design reproduction
The “pattern texture” enhances jewelry aesthetics, such as embossed patterns on pendants or brushed textures on bracelets. The press uses “fine character molds + low-pressure precise imprinting” to perfectly replicate design details:
Flat pattern imprinting: For silver pendants with floral patterns (0.1–0.2mm depth), set pressure 4–5 tons, stroke 30–40mm, using a “silicone mold transfer” — the pattern is engraved on the silicone mold first, then pressed onto the silver sheet, avoiding edge blurring caused by direct hard mold pressing.
3D pattern shaping: For gold rings with 3D dragon-phoenix patterns (0.3–0.5mm height), pressed in 2 steps — first, 3 tons pre-press to roughly fit the metal to the mold pattern, second, 5–6 tons fine press to ensure uniform depth, stroke 50mm. The resulting patterns have strong 3D relief with clearly visible details (e.g., dragon scales), achieving 20× higher efficiency than hand carving.
Batch consistency: With parameter locking + mold positioning, 100 identical silver pendants can be pressed in batch, with pattern position deviation ≤0.3mm and depth deviation ≤0.02mm, ensuring identical pattern quality across all pieces, suitable for mass production.
3.3, Electronics & Automotive
Electronics Industry: Precision Pressing & Marking to Ensure Component Stability
The core processing requirements in the electronics industry focus on “small component pressing” (e.g., connector pins, motor bearings) and “housing marking embossing” (e.g., serial numbers, brand logos), requiring precise pressure, zero damage, and high batch consistency. The equipment perfectly meets these needs through “micro-pressure adjustment + specialized fixtures.”
Electronic component pressing: precise pressure control to avoid damage
Electronic components often have plastic + metal structures (e.g., connectors, sensors). Pressing requires precise pressure control to prevent cracking of plastic housings or deformation of metal pins:
Connector pin pressing: For USB Type-C connectors (plastic housing + 0.3mm copper pins), set pressure 3–5 tons, stroke 20–30mm, using “step pressing” — first, 2 tons to preliminarily insert pins into housing holes, then 4 tons to fully press in place, avoiding cracks from single high-pressure pressing.
Key guarantees: Equipped with connector-specific positioning fixtures (with plastic protection pads) to prevent scratches and ensure pin-to-hole alignment deviation ≤0.1mm. Pressed pins achieve pull-out force ≥15N (meeting electronics industry standards), with no tilt or contact failure.
Motor bearing pressing: For micro motors (diameter ≤20mm), press bearings with 8–10 tons pressure, stroke 40–50mm, using a ring-shaped ram (acts only on bearing outer ring, not motor shaft), avoiding pressure transfer to internal coils. After pressing, radial runout ≤0.02mm, ensuring smooth, quiet motor operation.
Batch efficiency: 150–200 components per hour, 3–4× higher efficiency than manual pressing (30–50 pieces/hour), with a batch yield of 99.8%, no scrap due to pressing errors.
2. Electronic housing marking embossing: tiny characters, clear and durable
Electronic housings (e.g., aluminum shields, plastic cases) require embossed serial numbers or purity marks. Character size is small (1–2mm), depth shallow (0.05–0.1mm), requiring clear embossing without damaging the housing:
Metal housing embossing: For 0.5mm thick aluminum shields, emboss serial number “202405001,” set pressure 2–3 tons, stroke 15–20mm, using micro-character molds (1mm character height, hard alloy). Characters are sharp, complete, and withstand 100 friction cycles without fading (industry abrasion test).
Plastic housing embossing: For ABS housings, emboss brand logos at 1–2 tons pressure, stroke 10–15mm, using low-temperature embossing mode (ram temperature ≤40°C) to prevent deformation. Embossing depth 0.05mm, clear yet without weakening the housing.
Precise positioning: Optional CCD vision system automatically identifies housing position, ensuring embossing deviation ≤0.2mm, fully compatible with automated production lines without manual adjustment.
Automotive Industry: Small Part Shaping & Assembly for Structural Integrity
Processing requirements focus on “small metal parts” (e.g., connectors, brackets, bushings), requiring precise dimensions, strong structure, and durability under vehicle vibrations and shocks. The equipment meets automotive standards through “high-pressure stable output + durable molds.”
1. Automotive small part shaping: high-pressure forming, precise dimensions
Small automotive parts are mostly metal (copper, iron, stainless steel) and require bending, punching, or forming, with dimensional deviation ≤0.1mm and sufficient structural strength:
Copper connector shaping: For automotive wire harness copper connectors (1mm thick, 90° bend), set pressure 12–15 tons, stroke 60–70mm, using bending molds with angle stops. Bend angle deviation ≤0.5°, no cracks or wrinkles, meeting automotive bend strength tests (10 repeated bends without breakage).
Stainless steel bracket punching: For 2mm stainless steel brackets, punch 5mm holes at 18–20 tons (max rated pressure), stroke 80–90mm, using high-speed punching molds (Cr12MoV, HRC60+). 300–350 holes/hour, burr-free (Ra ≤0.8μm), no post-processing required.
Metal bushing forming: For suspension system iron bushings (ID 10mm, OD 20mm), set pressure 15–18 tons, stroke 50–60mm, using dual rams pressing from both inner and outer sides, ensuring uniform wall thickness (≤0.05mm deviation). Assembled bushings fit shafts tightly without looseness.
2. Automotive part assembly: secure connections, vibration-resistant
Assemblies must withstand long-term vibration, e.g., sensor-to-bracket connections, wire harness clip pressing:
Sensor pressing: Press automotive temperature sensors (plastic housing + metal base) onto metal brackets, 6–8 tons pressure, stroke 30–40mm, using buffer ram (spring-loaded, 0.5s pressure cushioning) to prevent cracking. Post-assembly strength withstands 50N pull with no displacement, meeting automotive vibration tests (10–2000Hz, no loosening).
Wire harness clip pressing: Press plastic interior wire harness clips, 2–3 tons pressure, stroke 15–20mm, using soft rubber protection ram to prevent crushing. Post-press, clips firmly hold wires (≤10N pull) under vehicle vibration.
Batch compatibility: Supports integration with automated feeding systems via PLC, enabling fully automated “pick – press – discharge” workflow, 200–250 parts/hour, meeting automotive mass production pace.
3.4, Hardware & Repair
1. Metal Bending: Accurate Angles, No Wrinkles or Cracks
For thin steel, copper, or aluminum strips (thickness ≤2mm), bending to fixed angles such as 90° or 135° is required for hardware brackets, equipment frames, etc.
Material & parameter adaptation:
1mm cold-rolled steel (hardness 150HV), bent 90°, pressure 12–15 tons, stroke 60–70mm, using bending molds with positioning blocks — molds have built-in angle stops (90°/135° selectable), avoiding angle deviation from manual bending.
1.5mm aluminum strip (hardness 35HV), bent 135°, pressure 8–10 tons, stroke 50–60mm, using slow-bend mode (ram speed reduced to 34mm/min) to prevent wrinkles or cracks from sudden force.
Precision & efficiency:
Bend angle deviation ≤0.5°, edges burr-free (Ra ≤1.6μm), no post-processing required.
120–150 pieces/hour, 2–3× higher efficiency than manual bending (30–50 pieces/hour). Batch consistency ensures all parts meet hardware assembly requirements.
2. Metal Punching: Accurate Holes, Smooth Edges
For thin metal sheets (thickness ≤3mm), punching 2–10mm diameter round or square holes is needed for hardware mesh covers, panels, hook mounting holes, etc.
Applications & parameters:
2mm stainless steel (hardness 200HV), punch 5mm round holes, pressure 18–20 tons (max rated), stroke 80–90mm, using high-speed punching molds (Cr12MoV alloy, HRC60+). Resulting holes are burr-free and deformation-free.
1.5mm aluminum sheet, punch 8mm square holes, pressure 10–12 tons, stroke 70–80mm, mold edges rounded (R0.5mm) to prevent corner cracking.
Core advantages:
Hole diameter deviation ≤0.05mm, precise positioning (using table scale or fixture, deviation ≤0.2mm).
300–350 holes/hour, 4–5× higher efficiency than manual punching (50–80/hour). Mold life is long (≥50,000 punches for stainless steel), reducing frequent mold replacement costs.
3. Hardware Part Embossing: Clear, Wear-Resistant Marks
Embossing brand logos or specifications (e.g., “M8 Bolt,” “304 Stainless Steel”) on hardware parts for product traceability and quality marking, requiring sharp, durable characters.
Applications & parameters:
M10 stainless steel bolt head, emboss “M10,” pressure 8–10 tons, stroke 30–40mm, using raised-character mold (2mm height), emboss depth 0.15–0.2mm. Edges are sharp, withstand 100 cycles of sandpaper abrasion without wear.
Aluminum equipment panel, emboss brand logo, pressure 5–7 tons, stroke 20–30mm. Aluminum is soft, so low-pressure multi-step embossing (2 steps, 3 tons each) ensures clear logo without deforming the panel.
Batch adaptation:
Compatible with automatic feeding systems for “auto loading – embossing – unloading” workflow.
200–250 pieces/hour, suitable for small-to-medium batch production in hardware factories.
Operation & Maintenance
Whether shaping precious metal bars, pressing jewelry components, or embossing electronic parts, the core operation process of the machine is consistent. Simply adjust the parameters and molds according to the processing requirements. No complex professional skills are needed, and the operation can be mastered within 30 minutes.
1. Step One: Pre-Operation Preparation (Critical! Prevents Processing Errors and Equipment Damage)
(1) Equipment Inspection
Basic check: Confirm the 380V three-phase power is securely connected, with no loose or damaged wires. Check that the machine is level (adjustable via leveling feet) to avoid pressure deviation caused by tilt.
Hydraulic system check: Open the oil tank and ensure the hydraulic oil level is between the “MIN–MAX” marks. If low, add #46 anti-wear hydraulic oil of the same brand; do not mix brands. Check hydraulic hose connections for leaks; tighten or replace seals if necessary.
Cooling system check: Verify the cooling water tank level (use purified water to avoid scaling); top up to the “MAX” line if needed. Start the cooling pump and ensure normal operation (no abnormal sounds or stalling) to maintain hydraulic oil temperature at 30–50°C during continuous operation.
Safety devices check: Test the dual-hand start buttons (must press both simultaneously; single-hand press does nothing) and emergency stop button (pressing immediately cuts power; can be reset by rotating), ensuring all safety functions are operational.
(2) Mold and Workpiece Preparation
Mold installation: Install the appropriate mold according to the processing requirement (e.g., gold bar shaping mold, jewelry pattern mold). Align the mold with the worktable and ram positioning pins (deviation ≤0.5mm), and tighten screws with a hex wrench (torque 5–8 N·m) to prevent mold shift or thread damage.
Mold cleaning: Wipe molds with a soft cloth to remove metal debris or oil. For precious metal processing, ensure no contaminants affect surface finish. If mold edges are slightly worn, lightly polish with fine sandpaper (800 grit or higher).
Workpiece preparation: Clean the workpiece surface with alcohol to remove oil or debris. Confirm the workpiece fits within the machine’s processing range (e.g., gold bar thickness ≤10mm, hardware size ≤400×300mm). For soft or easily deformable workpieces (like pure gold), apply a thin protective film to avoid scratches.
(3) Parameter Setting
Preset parameters: For frequent operations (e.g., “5mm gold bar embossing,” “1mm steel plate bending”), select the corresponding preset on the touchscreen. The machine automatically sets pressure (5–20 tons), stroke (100–250mm), and speed (68mm/min).
Custom parameters: For special workpieces, manually input:
Pressure: Based on material hardness (soft metals 5–10 tons, hard metals 15–20 tons; do not exceed 20 tons rated pressure).
Stroke: Based on workpiece thickness (e.g., 5mm workpiece → 60–70mm stroke to ensure full contact).
Speed: Default 68mm/min; soft workpieces can reduce to 34mm/min to prevent deformation; hard workpieces use default.
Parameter confirmation: Screen will display the input values (e.g., “Pressure 10 tons, Stroke 80mm, Speed 68mm/min”). Confirm and save to prevent processing errors.
2. Step Two: Start Processing (Fully Automatic, No Need to Monitor in Real Time)
(1) Workpiece Positioning
Place the workpiece at the center of the mold, aligning with the cross-scale lines on the worktable or positioning fixtures (deviation ≤1mm). For small components like electronic pins, optional microscope assistance can be used.
(2) Safe Start
Press dual-hand start buttons simultaneously (30cm apart). The machine automatically:
Ram descends at set speed
Applies stable pressure after contacting workpiece
Holds 2–3 seconds to ensure proper embossing or shaping
Ram rises and resets automatically
For first-time processing, trial 1–2 pieces: check dimensions and surface quality (e.g., gold bar size deviation, pattern clarity). Adjust parameters if needed (e.g., increase 0.5 tons if embossing is unclear, decrease pressure if deformation occurs).
During batch processing, check molds and workpieces every 30 minutes. Meanwhile, prepare the next batch without needing full-time supervision.
3. Step Three: Post-Operation (Protect Equipment and Prepare for Next Use)
(1) Machine Shutdown
After completing all workpieces, press the Stop button and turn off the main power.
For long-term inactivity (>24 hours), turn off the cooling system and drain water from the pipes to prevent freezing in winter.
(2) Cleaning and Organization
Mold cleaning: Wipe mold surfaces with a soft cloth to remove metal debris. For adhered material (e.g., aluminum chips), soak a cloth in alcohol before wiping; do not scrape with hard objects. Apply a thin layer of anti-rust oil after cleaning, then remove and store molds (especially for long-term storage).
Worktable & machine cleaning: Use compressed air to blow out debris from crevices, then wipe surfaces with a damp cloth to remove oil and dust.
Workpiece organization: Sort and store finished workpieces, recording quantity and parameters for traceability.
Model Selection Guide
Step One: Clarify Key Requirements for Hydraulic Press Selection
1. Determine “Material & Process” (affects tonnage and pressure precision)
Different material hardness and ductility directly affect the required rated tonnage and pressure control precision of the hydraulic press. This is the primary basis for selection:
Soft materials (gold, silver, aluminum, plastic):
Processes include embossing, shaping, light pressing (e.g., gold bar embossing, aluminum sheet bending). Required tonnage: 5–20 tons; pressure precision: ±2% (to avoid deformation).Medium-hard materials (copper, iron, stainless steel thin plates):
Processes include punching, bending, pressing (e.g., copper connector pressing, 1–2mm stainless steel plate punching). Required tonnage: 15–30 tons; pressure precision: ±3%.Hard materials (thick stainless steel, titanium alloy, industrial alloys):
Processes include thick plate punching, heavy shaping (e.g., 3–5mm stainless steel plate bending, titanium alloy part forming). Required tonnage: 30–50 tons; high-pressure stabilization system recommended.
2. Determine “Workpiece Size” (affects worktable size and stroke)
Maximum length & width: Must fit within the effective worktable area (leave 5–10cm margin). Example: processing a 30×15cm gold bar → worktable ≥ 40×20cm.
Maximum thickness / processing height: Should be less than 70% of the machine’s maximum stroke (allowing ram clearance). Example: processing a 5cm thick metal → stroke ≥ 8cm (5 ÷ 70% ≈ 7.1cm, rounded up).
3. Determine “Production Capacity” (affects automation level)
Production scale determines whether automatic feeding or high-tonnage models are needed:
Small batch / custom (<100 pcs/day): Jewelry studios or small repair workshops can use basic manual adjustment models without automatic feeding.
Medium batch (100–500 pcs/day): Small-to-medium hardware or electronic component factories may use models with parameter memory and batch counting to improve efficiency.
Large batch (>500 pcs/day): Precious metal refineries or automotive parts factories require models with automatic feeding and PLC integration for production line automation.
4. Determine “Precision Requirements” (affects equipment configuration level)
Precision needs vary by industry and determine the core configuration:
High precision (deviation ≤0.1mm): Electronic component assembly, medical parts → require photoelectric stroke switches and high-precision pressure sensors.
Standard precision (deviation ≤0.5mm): Hardware brackets, jewelry shaping → basic mechanical limit + standard pressure sensor suffices.
Low precision (deviation ≤1mm): Large metal parts correction, rough processing → simplified models to reduce cost.
Step Two: Understanding Superbmelt Hydraulic Press Core Parameters (Decoding Model “Codes”)
Superbmelt hydraulic press model codes are “SPB-XXTS” (e.g., SPB-20TS, SPB-30TS), where “XX” indicates rated tonnage and “TS” means precision type. Key differences to focus on:
| Model | Rated Tonnage | Max Stroke | Worktable Size (L×W) | Pressure Precision | Power Supply | Core Configuration Differences |
|---|---|---|---|---|---|---|
| SPB-10TS | 10 tons | 150mm | 300×200mm | ±2% | 220V Single Phase | Basic: mechanical limit, manual parameter adjustment, no cooling system |
| SPB-20TS | 20 tons | 250mm | 500×400mm | ±2% | 380V Three Phase | Standard: photoelectric stroke switch, touchscreen parameter memory, cooling system, dual-hand start |
| SPB-30TS | 30 tons | 300mm | 600×500mm | ±1.5% | 380V Three Phase | Enhanced: high-precision pressure sensor, automatic pressure release, compatible with automatic feeding |
| SPB-50TS | 50 tons | 400mm | 800×600mm | ±1.5% | 380V Three Phase | Heavy-duty: dual hydraulic cylinders, reinforced frame, PLC control, intelligent oil temperature control |
| SPB-20TS-A | 20 tons | 250mm | 500×400mm | ±2% | 380V Three Phase | Automated: SPB-20TS base plus automatic feeding, CCD positioning |